Dev-C++ is an open source development platform that can be downloaded for free from Bloodshed’s web site. The present article is aimed at providing step-by-step instructions on how to create a resource DLL with that software.
Note: On a few occasions, files created by Dev-C++ will have to be saved in the folder where the bitmaps files are located. So it might be wise to copy your image files to a Dev-C++ sub-folder specially created for the purpose.
Creating the DLL requires three steps:
Creating a Project
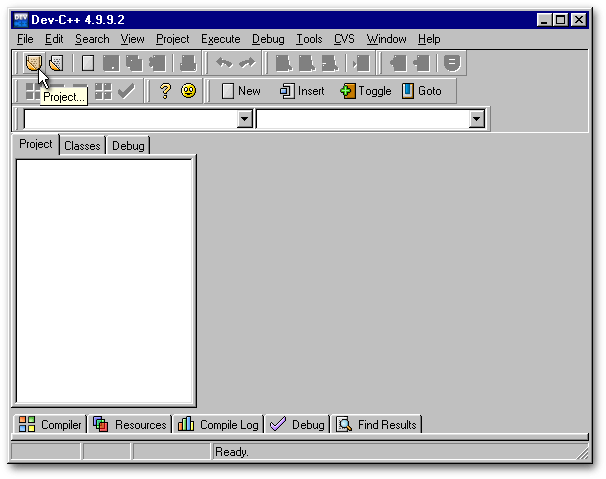
To create a project, select the menu item File|New|Project… or click the first toolbutton in Dev-C++’s toolbar.

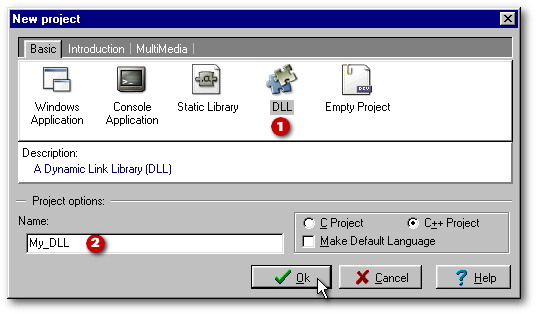
In the New Project dialog box, click the DLL icon, give a name to your project and click the OK pushbutton.
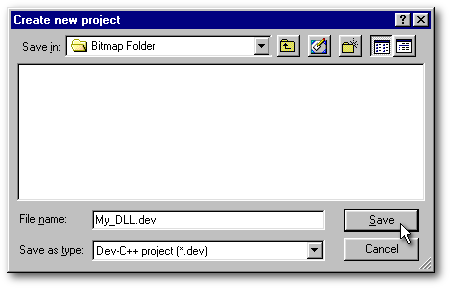
Use the combobox at the top of the Create new project dialog box to move to the folder where your bitmap images are located, then click the Save pushbutton. Dev-C++ will add the .dev extension when it is missing.
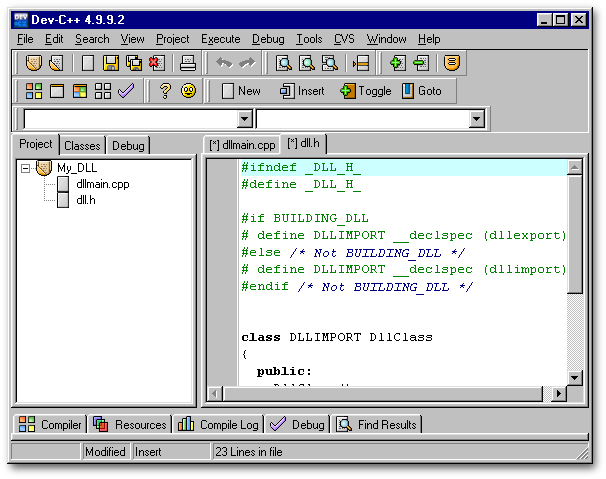
The new project will appear as the root of a treeview in Dev-C++’s left notebook (see below). Moreover, Dev-C++ creates automatically two files that are needed for that project. Their code can be seen under the tabs of the notebook at right.
The Resource File
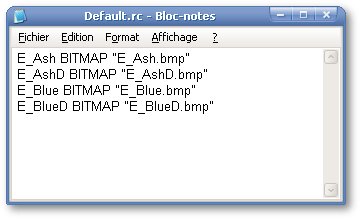
A resource file is simply a list of the objects to be included in the DLL. Since it’s a pure ANSI file, that list can be written with any text editor — Windows’ Notepad, for example — as long as it is saved with a .rc extension.
With Borland’s Resource Workshop, one just has to drag’n drop the names of bitmap files from Windows’ Explorer to that software and the resource file is automatically created. Not so under Dev-C++: the list has to be created by hand. However, we can use long file names (while Resource Workshop required the archaic 8.3 DOS file name).
My own preference is to use the dBASE Resource File Builder, available at the end of this article (note: the zip file contains the executable and its source code). Even if it doesn’t support Drag’n Drop, it’s the easiest tool to build .rc files.
So we can create the resource list with the dBASE Resource File Builder — if not under Dev-C++ — or, if that .rc file already exists, it can be loaded in that software. Let’s look at each of these three possibilities.
Creating the List with Dev-C++
To create a resource file with Dev-C++, select the menu item File|New|Resource File.
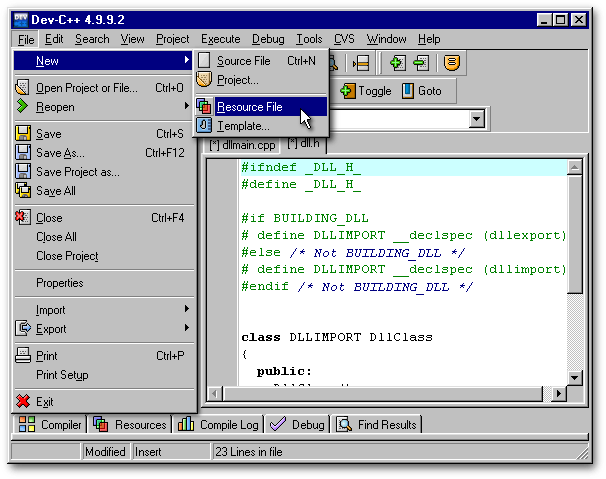
Dev-C++ will ask you if you want to add that resource file to the project: click the Yes pushbutton. Then type the list. Each entry in the list carries three types of information:
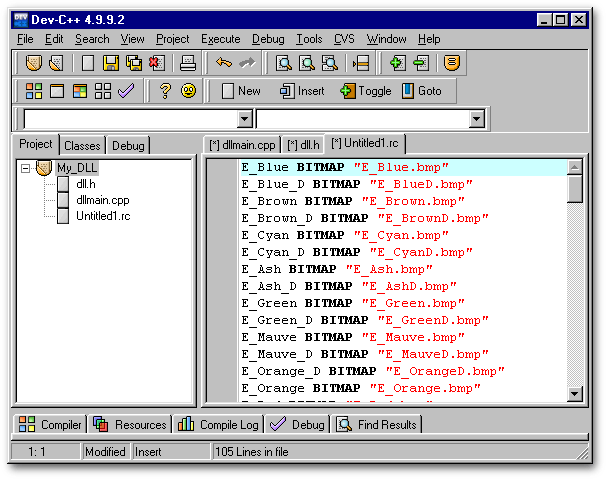
When you’re through, save (Ctrl-S) your resource file in the folder where your bitmap images are located. If you don’t save it before compilation, you’ll get a compilation error.
Creating the List with the dBASE Resource File Builder
First click on the Load… pushbutton to select the folder where the images to be listed in the resource file are located.
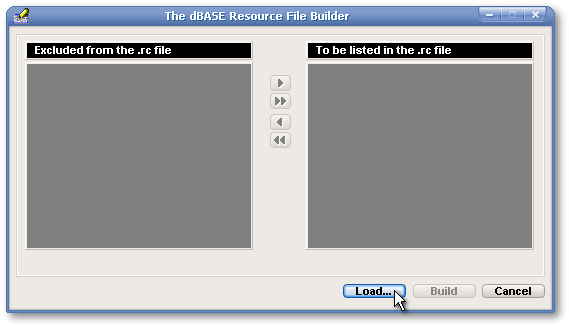
As soon as a folder is selected, the filenames of all the images in that folder become listed in the Excluded from the .rc file listbox, at left. Use the Add or Add All pushbuttons to prepare the list of the filenames to appear in the .rc file.
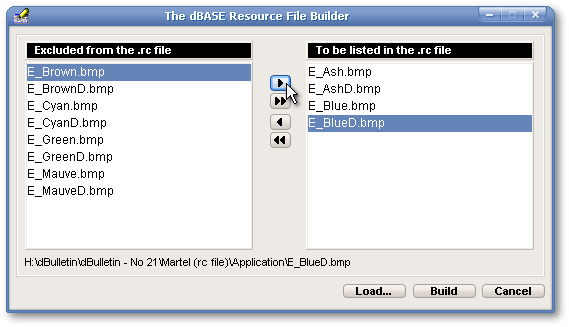
When the list is completed, click the Build pushbutton and write the name of your resource file in the dialog box. Finally, click the OK pushbutton.
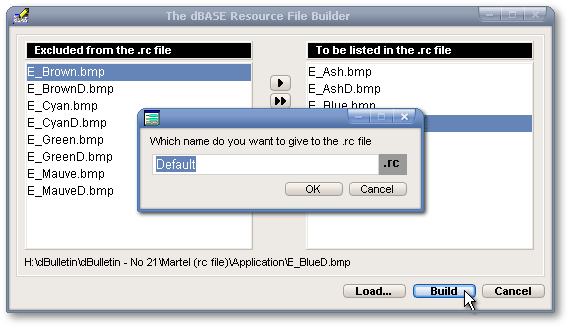
The following message box will appear as soon as your resource file has been saved (note: it is saved in the current folder — where your image files are located). The message box offers the possibility to consult the .rc file. If the user clicks on the Yes button…
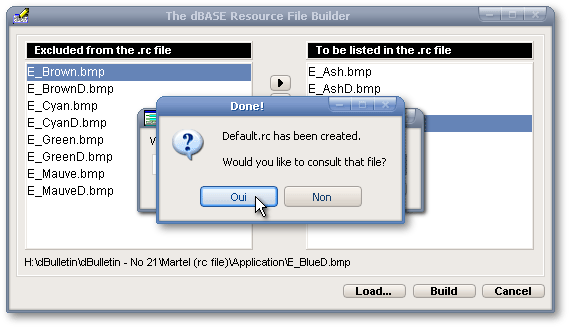
…it will be loaded in Notepad. Otherwise, the user is brought back to the main form of the dBASE Resource File Builder.
Loading the Resource List
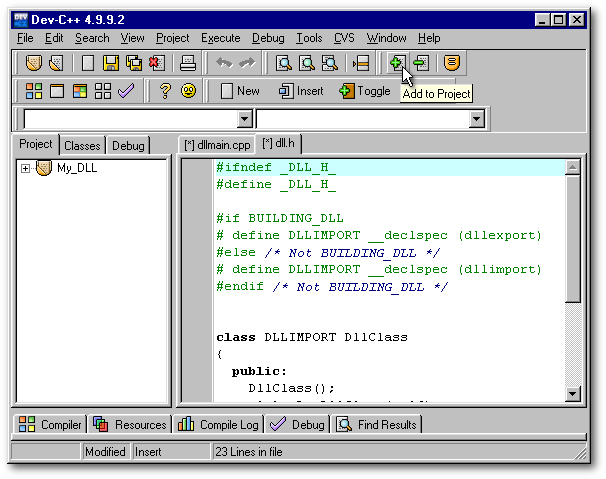
To add to the project a resource file already created (with other software, for example), select the menu item Project|Add to project… or click the Add to Project toolbutton and select the .rc file with the Open File dialog box. That file should be in the folder where your bitmap images are located.
Compiling Images into the DLL
Select the menu item Execute|Compile or click the Compile toolbutton or the Ctrl-F9 shortcut.
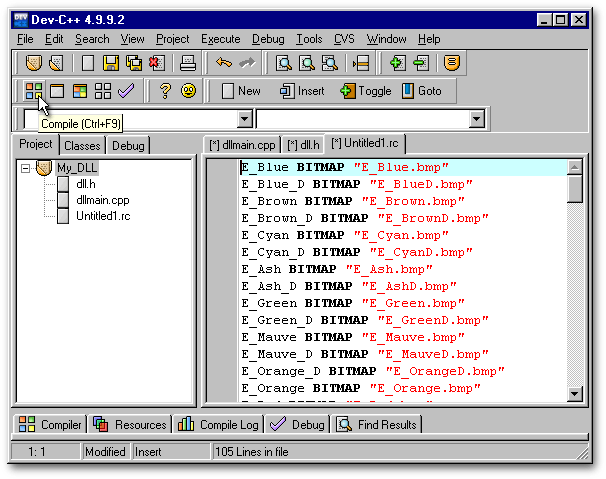
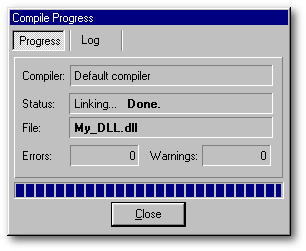
You’ll be asked to save the two files created by Dev-C++ in the Template sub-folder. These two files don’t have to be saved in the folder in which the bitmap images are located. So click the OK pushbutton. A dialog box will tell you if the DLL was successfully created.
Conclusion
dBASE can’t create DLLs. This has never been a limitation for dBASE developers since we always had the possibility to dataSource our controls to images stored in the binary field of a dBASE table — without the bloating or the corruption associated with other table formats (namely Access).
For the rest of the software industry, the choice was between having images files scattered in a folder or storing the images in a DLL. The choice was obvious. Consequently, DLLs are seen as a “professional” solution. For those who prefer that solution but can’t afford Borland’s C++ Builder or Microsoft’s Visual C++, Dev-C++ is an essential tool to be added to one’s toolbox. It gives developers who know nothing about the C++ language a chance to build resource DLLs with a few mouse clicks.